Pumpkin Filled Cream Puffs with Rum Glaze Recipe

While you may be scoffing at the thought of baking cream puffs from scratch- "you want me to bake that- by myself?", don't freak just yet.
Cream puffs are surprisingly simple to bake and with the right ingredients, come out perfect almost every time. I've made cream puffs- or 'Pate a Chou' as the fancy and French call them multiple times and every time they've been a huge crowd pleaser. While they look quite impressive, the steps aren't that difficult, though there are quite a few. This recipe is perfect to have on hand for any dinner party or holiday get together.
Ingredients
Puffs
3/4 cup water
1/4 cup milk
1/4 teaspoon salt
1/2 cup unsalted butter
1 1/4 cups sifted bread or unbleached flour (do not try and substitute all purpose flour)
4 large eggs
Mixed together, set aside for brushing:
1 tablespoon milk
1 egg
Simple Filling
Whipped Cream (as much as you'll need to fill the puffs)
or for a seasonal taste, try:
Pumpkin Filling
1/2 cup of pumpkin filling or pumpkin puree (add more or less depending on how many puffs your recipe yields)
1 tsp of cinnamon
Dash of nutmeg, ginger, ground cloves, allspice (for flavour)
1/4 cup of icing sugar
Rum Glaze
1/3 cup of butter, melted
1/2 cup of icing sugar
1/8 cup of milk
1 tbsp of pumpkin puree
Splash of maple syrup
Splash of rum
Before you start
Preheat oven to 425 F (215 C) and line baking sheet with parchment paper or foil (tip: as I once learned, wax paper is not the same thing as parchment paper. Don't go there). Measure out your flour and presift it so it's ready to go by the stove top.

On medium heat, pour water and milk into medium size saucepan, add salt, stir together. Add butter, turn heat up to medium-high setting and bring to a rolling boil.
Add the flour all at once and stirring constantly and fast until dough forms. The dough should stick all together and pull away from the sides.

Mash the mixture down against the pan bottom and let cook for an additional 1-2 minutes. You may continue to stir or cut the mixture.
Tip: At this time, I turn the heat down to low-medium setting, otherwise your dough will burn the bottom of your pan which sucks big-time. If you want to continue stirring and not mash it down, this will work too.
Remove from heat entirely and allow the mixture to cool for up to 5 minutes. You will be adding the eggs next and they should not cook in the hot mixture.
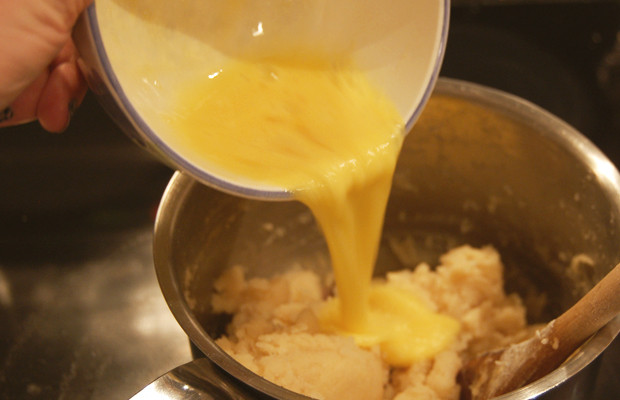
In a bowl, beat each egg separately then add to dough. Stir in until completely absorbed. After the last egg is added, the dough should be shiny.
Tip: You know that your dough is ready when it is stiff enough to hold its shape but soft enough to scoop up and form easily. You can use your dough right away or freeze it for another day.

Spoon out small balls of the dough and place on baking sheet at least an inch apart.
Tip: I use a tablespoon for this! If you have a pastry bag, you can use it to pipe out small balls.
Using a brush, paint on your egg-milk mixture: you don't need to apply too much.
Tip: I like to add a pinch of sugar and some cinnamon or other spices for this step.

Bake in oven at 425 F for 15 mins. After 15 mins, turn oven down to 375 F and leave in for 5-10 minutes longer depending on size.
Tip: You will know if your cream puffs are ready by their golden colour and by tapping them lightly with your fingernail or utensil. They should sound hollow.
Prick a small hole in each one to let steam escape. Turn off the oven's heat and then put them back into the oven for an additional 15- 30 minutes to let them dry completely.
Tip: Cream puffs do taste best fresh so if you won't be eating them for a while, freeze your dough and make them the day you need them.

After the puffs have cooled, carefully cut off the tops. They should have a hollow (or mostly hollow) interior. Spoon or pipe each puff full with your chosen filling (whipped cream or Pumpkin), and place the top of the puff back on like a lid.

Mix all ingredients for the Rum Glaze together. Using a spoon, drizzle the glaze over the tops of the stuffed cream puffs.
Tip: The glaze and pumpkin filling are my own concoction, so feel free to adapt to taste and experiment with proportions for your desired consistency and texture. Your glaze should be of a light syrupy consistency. If it is too thick, add more milk or melted butter. If it is too thin, add more icing sugar or pumpkin puree. Boost the syrupy texture by allowing it to sit at low-medium heat in a saucepan.
Serve and accept the compliments of your friends graciously.
Recipe adapted from The Complete Book of Pastry, Sweet and Savory
Facebook Comments
12 Comments
 | I really need to make these this weekend - mm! |
 | |
| I must appreciate you for the information you have shared.I find this information very useful and it has considerably saved my time.thanks:) |
 | Looks yummy. |
 |
|
 | look good and simple to do, thanks! |
 | YUM!These look good....I was given tons of pumpkins from someones farm they had a great crop this year.I made a puree and froze all the puree.I needed some pumpkin recipes so thanks for sharing. |
 | If I was a lady of leisure I'd bake these all day and then eat them all day long........mmmmmmmmmmmmmmm |
 | Mmm looks good! |
| I cooked up the pumpkin from my Jack-o-Lantern after Halloween and have been using it up steadily. Was out of ideas... until now. Yum! |
Add Comment:
Related Articles


Previous Articles